
Follow the steps below to get started.
- As an account administrator, go to Settings, under App Settings select "Deficiency Corrective Actions"
- You can add a new category (optional but recommended) to categorize your corrective actions by program or by action type.
- Select "Manage Corrective Action Categories" from the top right.
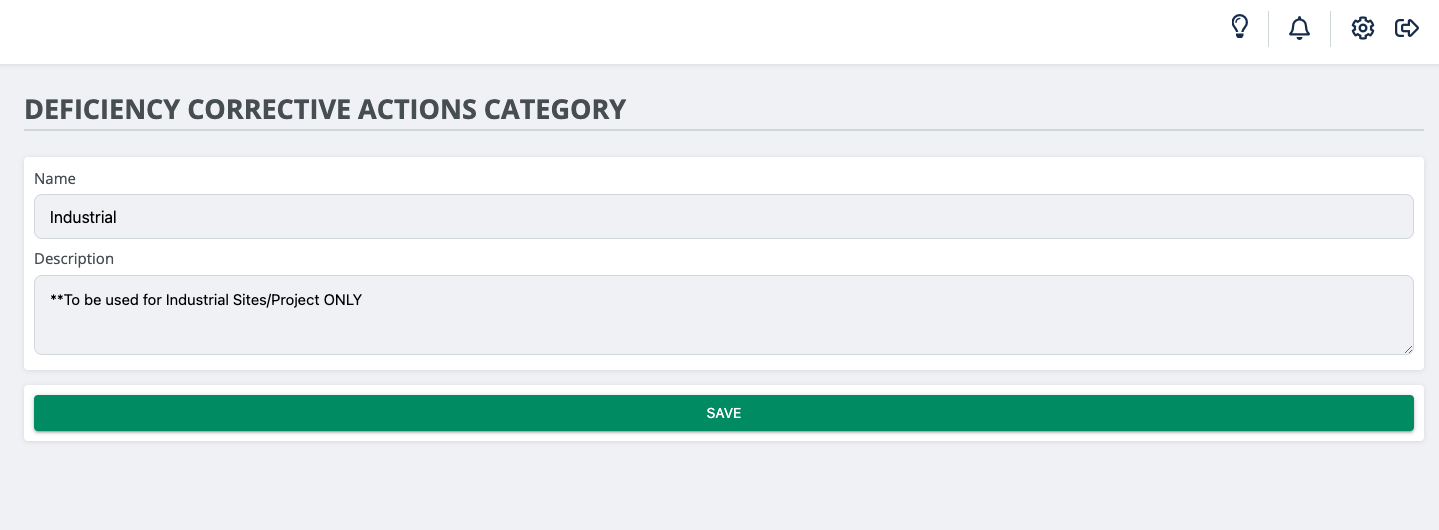
- Add Corrective Action Category
- Give the Category a Name and a Description, then select save when finished.
- Next, go back to "Manage Corrective Actions" or "Cancel and Go Back" and add a new Corrective Action
- Create a Corrective Action by giving it a short Title, a Corrective Action, and assigning it to a category (if applicable).
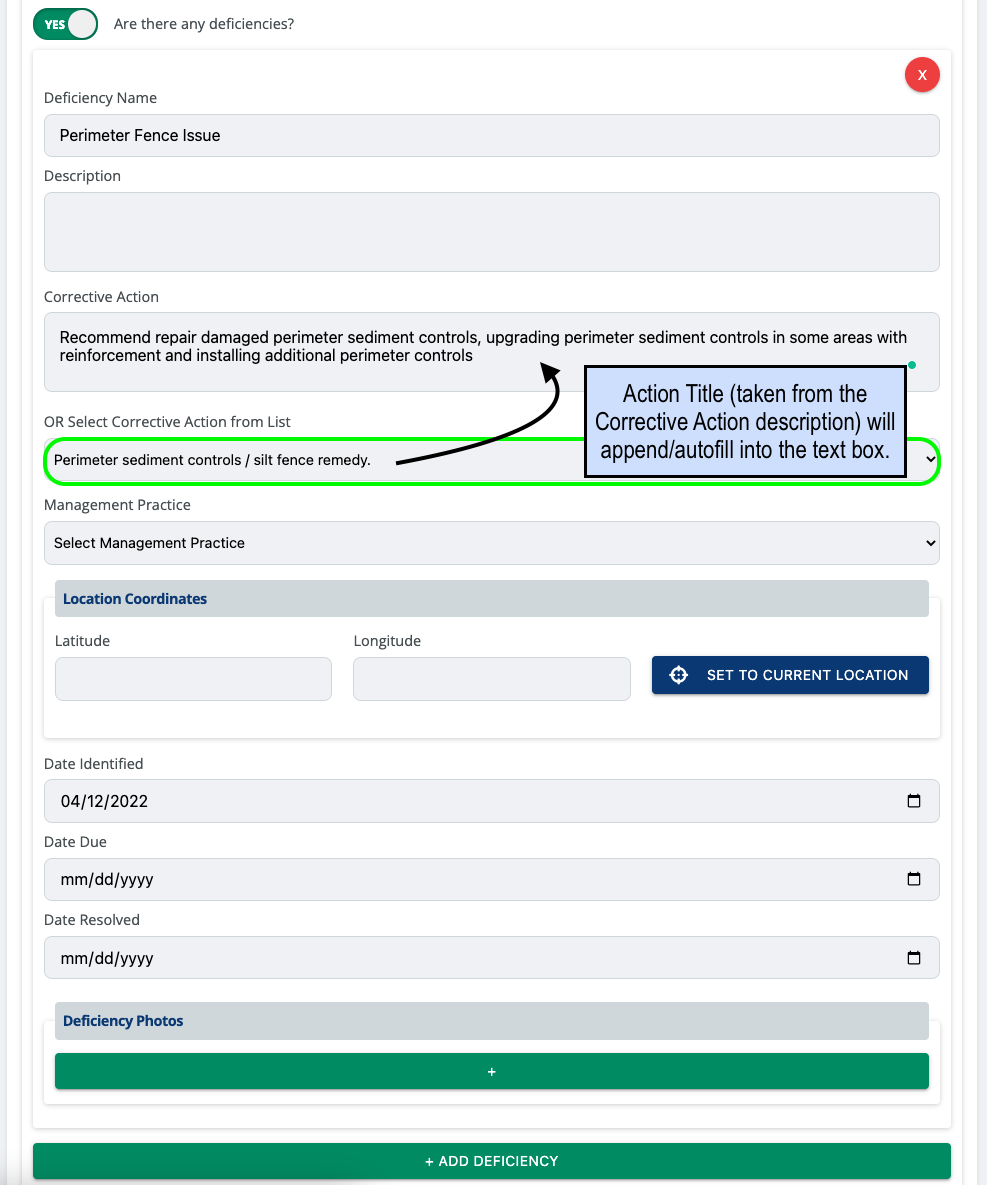
- Note: For longer Corrective Action descriptions, it is recommended to enter this data into the Corrective Action text field as seen above. If the corrective action is short (for example, 1 sentence), you may copy and paste this to both the Title and Corrective Action fields.
- Select "Manage Corrective Action Categories" from the top right.
- When finished, contact a CloudCompli System Admin or Help Desk and let us know to activate this new flow on your deficiencies.


DID YOU KNOW each form can have its own specific corrective actions, this can be possible if multiple categories exist. If certain forms require a specific set of corrective actions that don't necessarily pertain to other forms, let us know which category you would like to use for each form.
Sample Deficiency Component with Predefined Corrective Actions Enabled:
Contact our Help Desk to schedule a training for additional assistance or to learn more about this new feature. support@cloudcompli.com