
NOTE: The Power BI Analytics Development Kit is currently under beta testing. This means that you may encounter bugs (please report them to here) and that the connector may change significantly before final release.
Step 1. Download the Power BI Connector
To download the Power BI Connector, visit:
https://github.com/cloudcompli/power-bi-adk/releases
Navigate to the most recent release, click on the Assets dropdown, and download the CloudCompli.mez file.

NOTE: As open source software, you may also download and modify the source code to fit your own needs, but if you're just looking to install the Power BI ADK, you will want the .mez file and not the source code.
Step 2. Install the Power BI ADK
Once you have downloaded the CloudCompli.mez file, you will want to place it in the following location (you may need to create the folders if Power BI did not already do this for you):
Documents\Power BI Desktop\Custom Connectors
Next up, open Power BI and go to File > Options and settings > Options, navigate to the Security tab, and select the option Allow any extension to load without validation or warning:
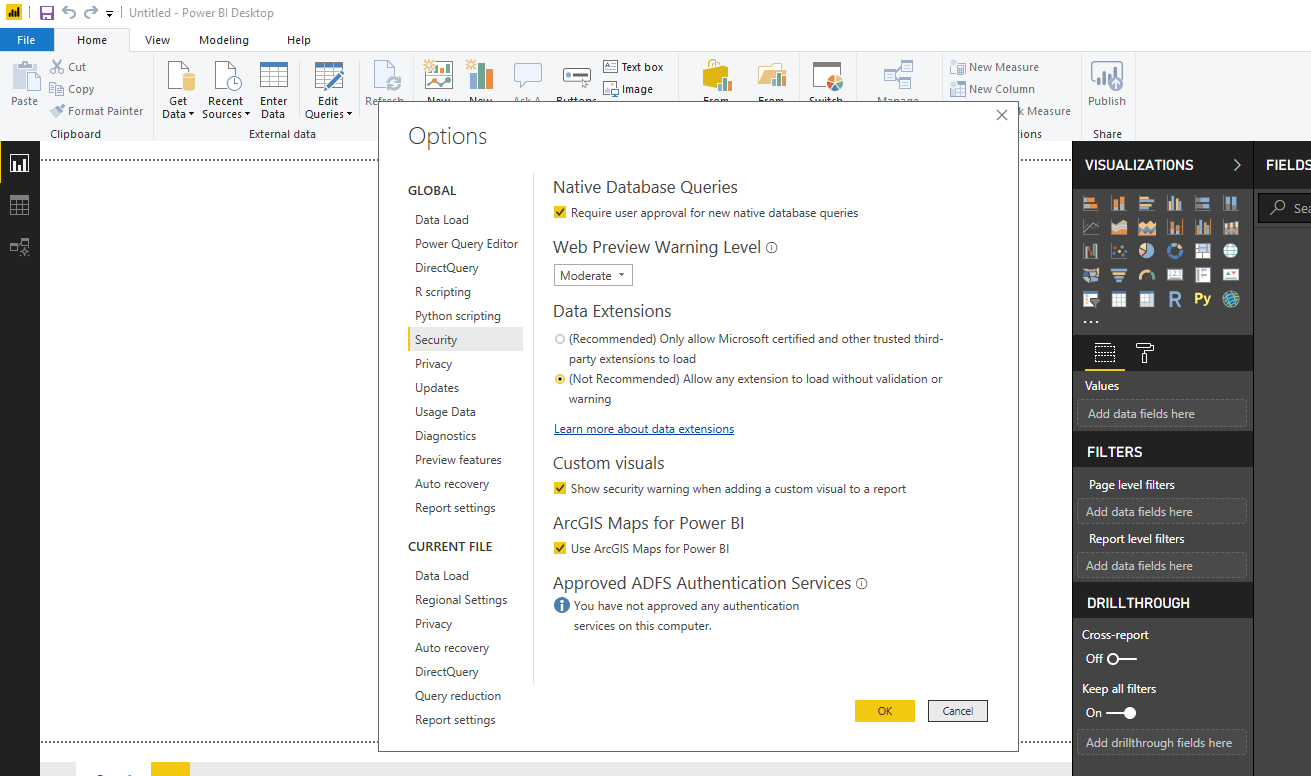
Press Ok and then close Power BI and reopen it.
Step 3. Get a API Client Token
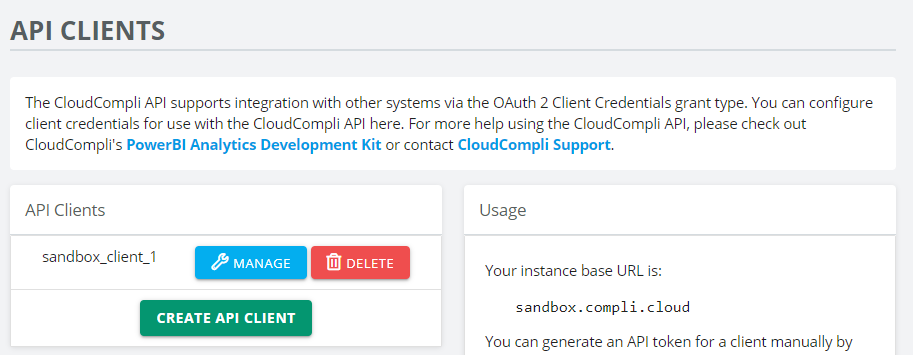
The next step is to get an API token so that the ADK can securely communicate with the CloudCompli API. To do this, log into CloudCompli and navigate to Settings > App Settings > API Clients (must be an administrator to do this):

If you have not already set up an API Client you wish to use, press Create API Client and use either the default prompted values or specify your own client ID and secret:

Alternatively, if you already have an API Client, then just press Manage for it on your list of clients:
You will then arrive at a screen with a number of options and examples. In this case, you will want to press Generate Token:

After a few moments, a new token will be generated for your use:

Save your Instance Base URL and Token values from this popup, as you will be using them in the next step to configure the connector in Power BI.
NOTE: This token will be good for one year, after which time you will need to refresh it with a new token. Additionally, if you wish to revoke all tokens for this API token, you can press Revoke All Tokens to expire all API sessions at any time. If you do this, all API clients, such as the Power BI custom connector, will need a new token in order to work.
Step 4. Select CloudCompli Data Sets
Once you have installed the CloudCompli.mez file (Steps 1 and 2), disabled Microsoft's extension validation and relaunched Power BI (Step 2), and retrieved your Instance Base URL and Token (Step 3), all you need to do now is select a data set to load.
To pull in a data set, go to Get Data > Online Services, select CloudCompli and press Connect:

Next up, you will be presented with a screen to select a data set from the CloudCompli API:

Depending on which features of CloudCompli you have subscribed to, some of the data sets in this picker may not be relevant to you.
Once you have selected a data set, if the data set requires Query Properties, provide them as well using JavaScript Object Notation:
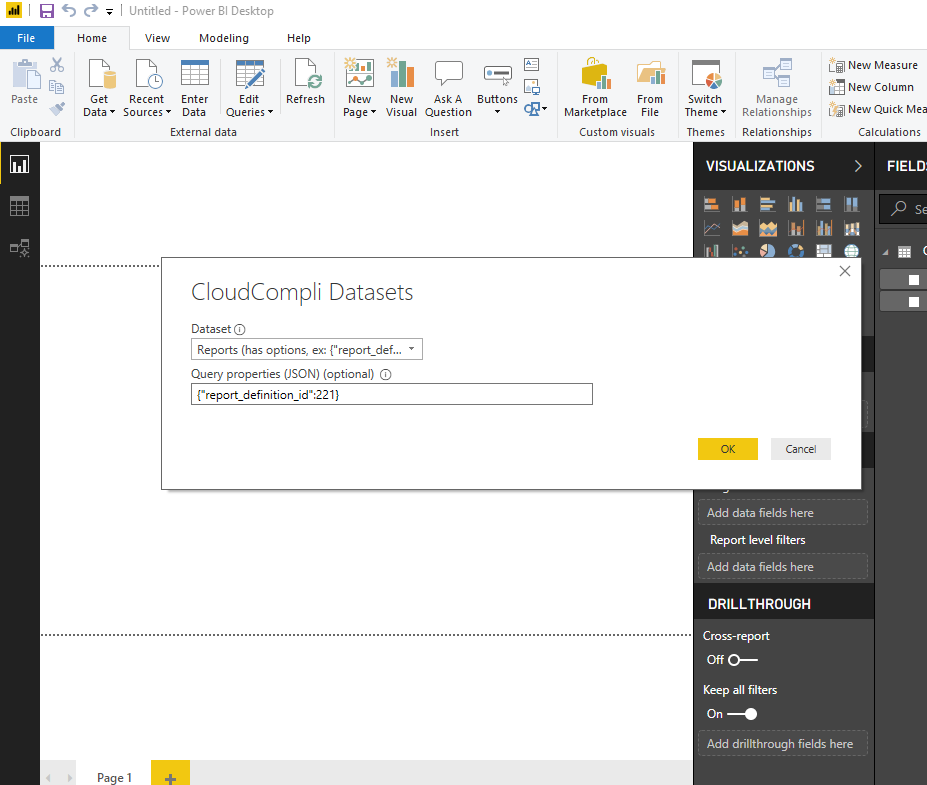
Once you have entered the necessary Query Properties (or skipped this step if they are not relevant to the specific data set you are interested in), hit Ok.
If this is the first time you're connecting to CloudCompli from Power BI, you will be prompted with the following for you to fill in your Instance Base URL and Token you retrieved in Step 3:
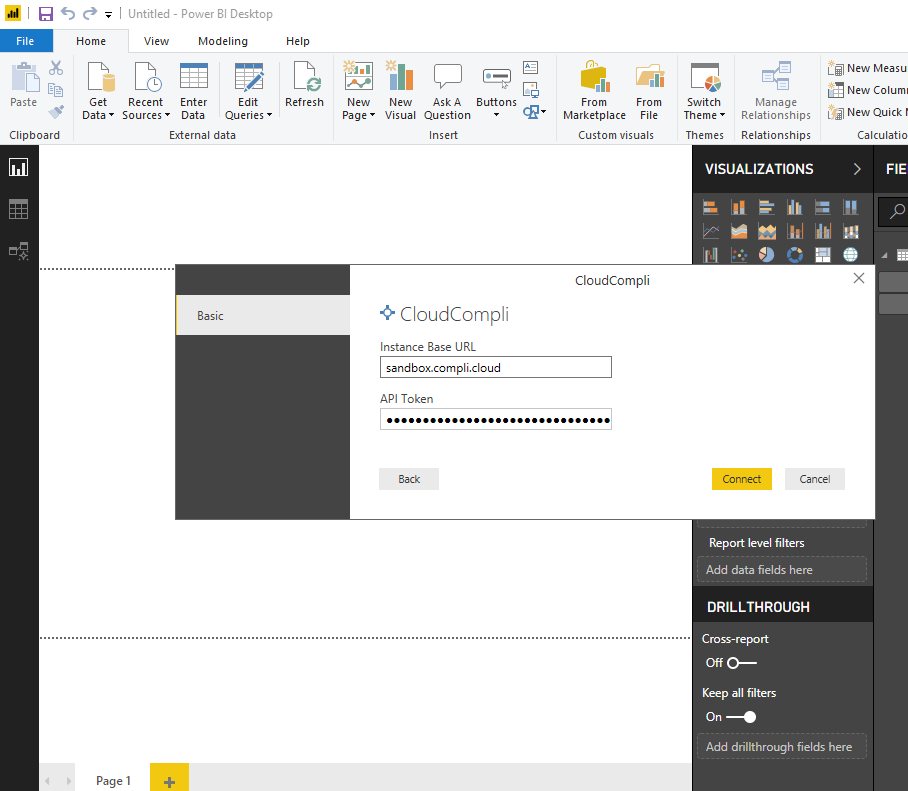
Once you enter your credentials and continue (or if you are adding additional data sets, since your credentials will be saved), you will then be presented with a sample of the data set. Press Load to pull in the data set.
And that's it! Now you can start working with it via Power BI as you do with any other data set.