What are Site Tags and Statuses?
Tags are a great way to organize your CloudCompli projects, and statuses are a great way to separate those that you're actively working with from those that are not currently of concern. Not only are they a good way to sort through your site list, but also a great filterting tool on the Analytics page. All users who can edit a site can attach tags to it.
Settings Site Tags and Statuses
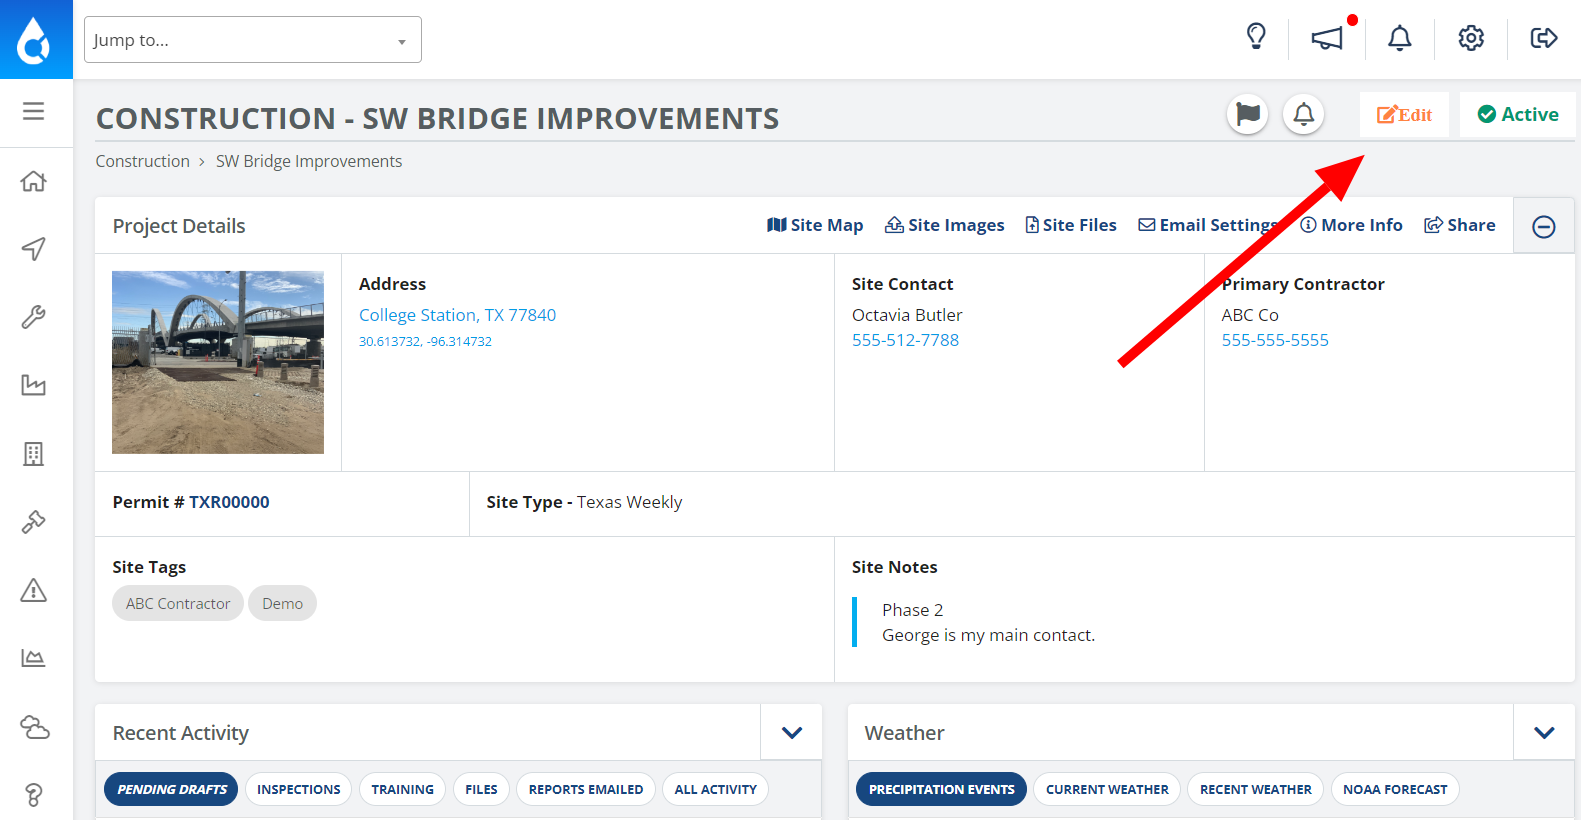
Both tags and statuses can be applied by going to your site page and then pressing Edit.
If you are an administrator and wish to set many tags at once, you can also go to Settings > Site Tags > Bulk Tag Editor to add to or remove from many sites at once.
Configuring Site Tags and Statuses
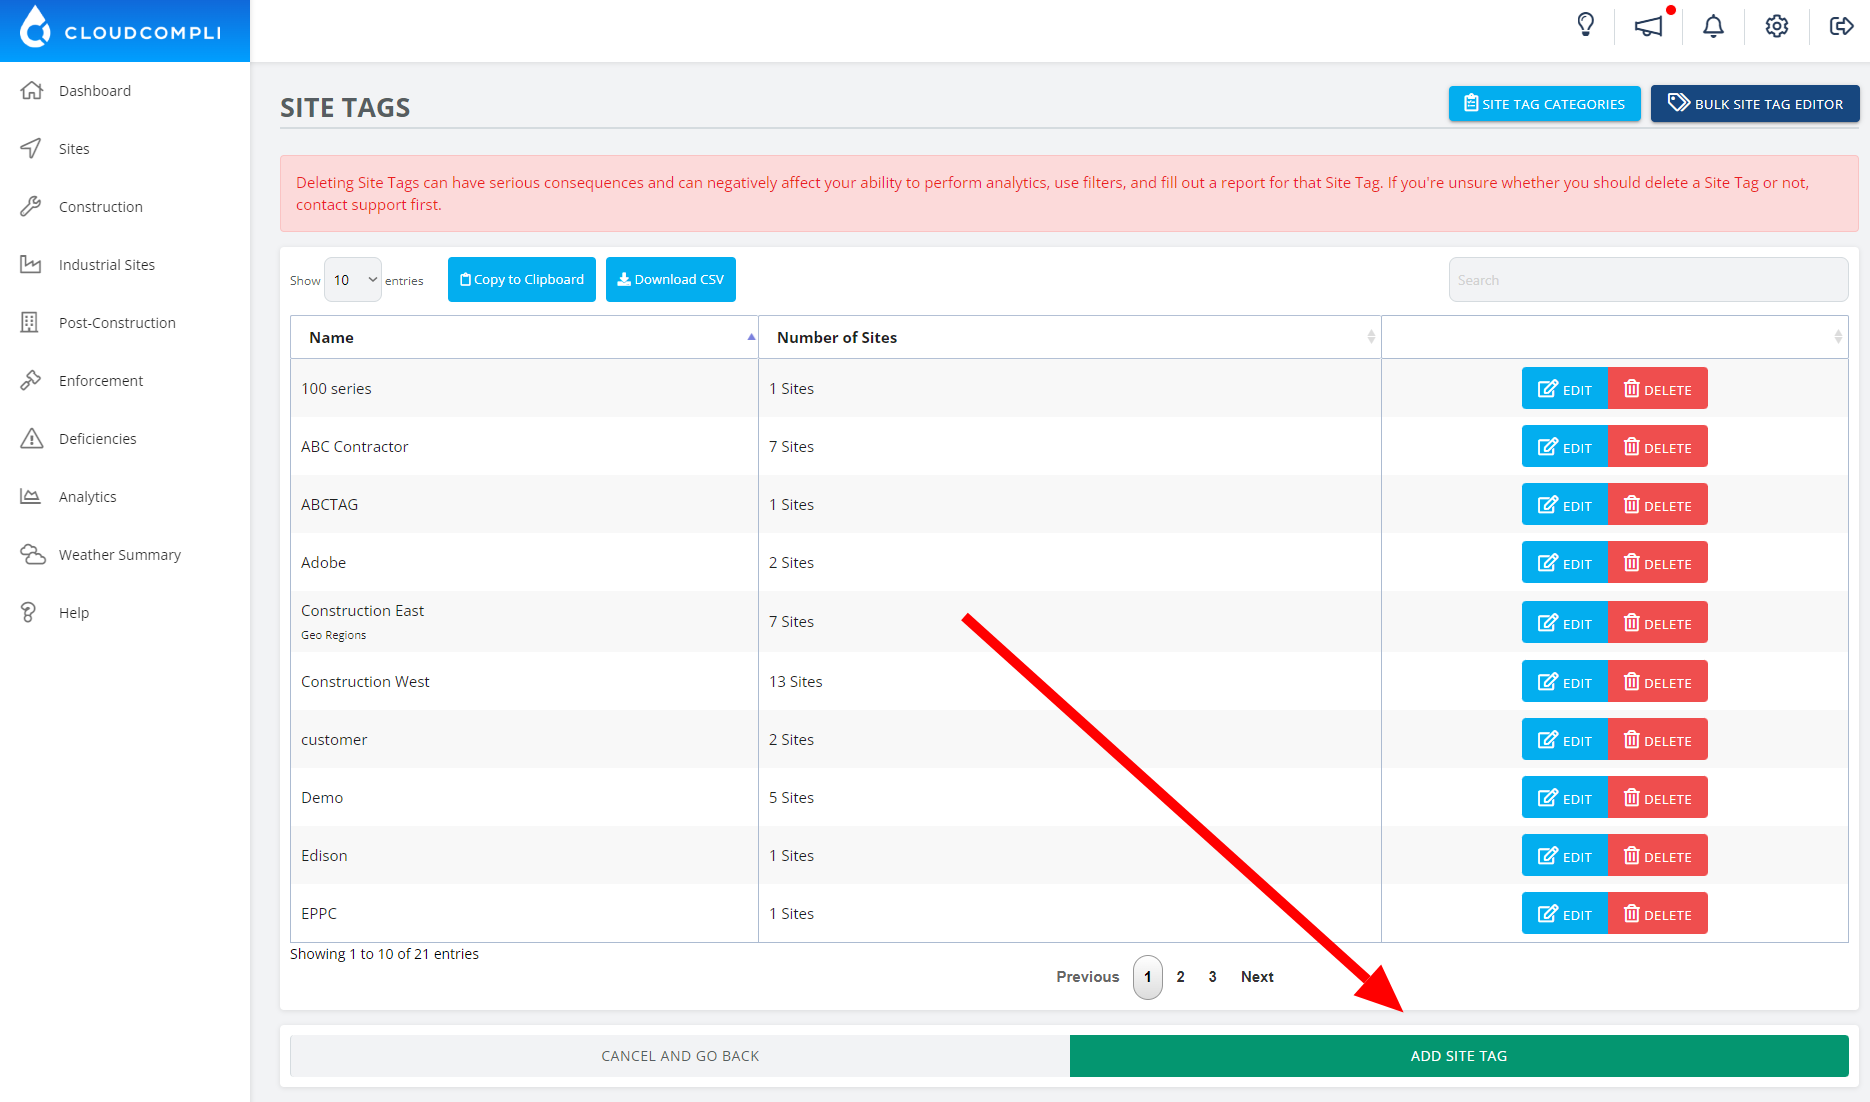
To create new tags, if you are an administrator, you can go to Settings > Site Tags and then click Add Site Tag at the bottom of the form. You will also find the ability to edit Site Tag Categories from this same page. These categories can be useful for some workflows, and if you're curious on how to use them, please contact CloudCompli Support for more information.
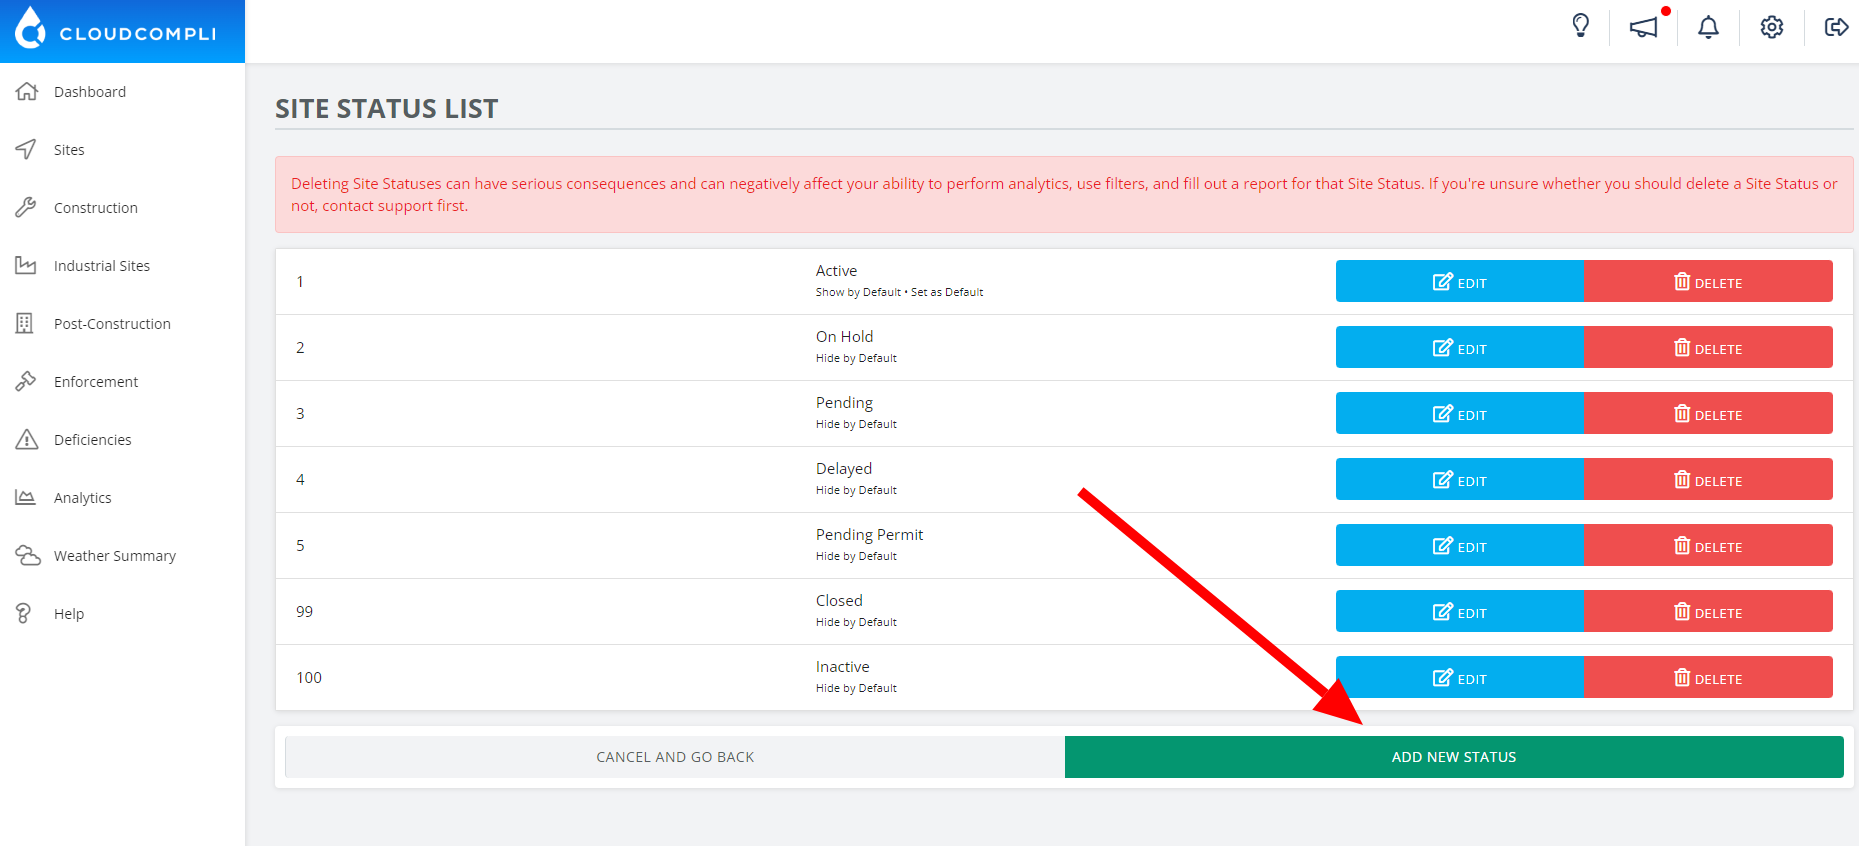
To create new statuses, if you are an administrator, you can go to Settings > Site Statuses and then click Add Site Status at the bottom of the form. In addition to setting the name and display order for this status, you can also define whether you'd like it to be the default for new sites, whether you'd like sites with this status to show up on filtered lists by default, and whether you'd like reporting requirements computed for sites of this status.
To create new tags in the system, please contact your site administrator.


